Tuesday, January 31, 2012

Family/festive calendar

I got this dry erase calendar from Joann's crafts about a month ago. It is glass and you can change the month using a dry erase pen. It was normally $50 but I have a coupon for 50% off one item and 20% off your entire purchase so I got it for around $20.

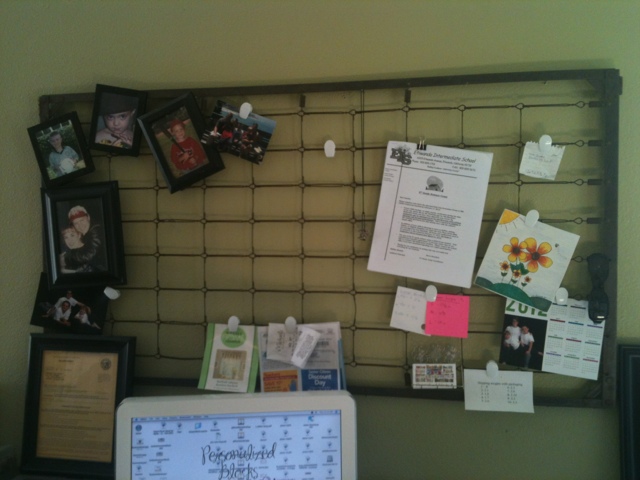
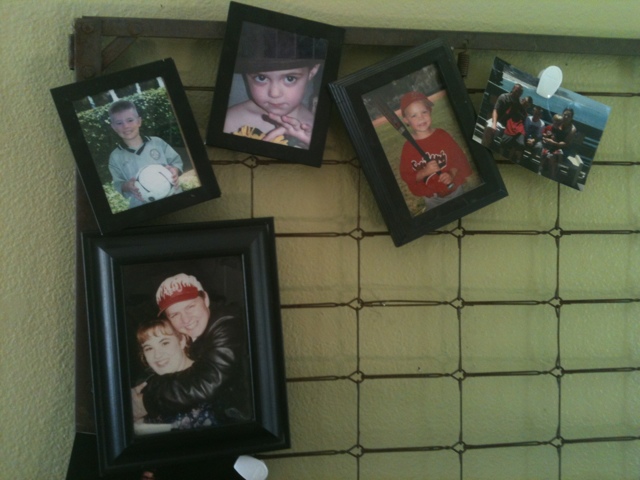
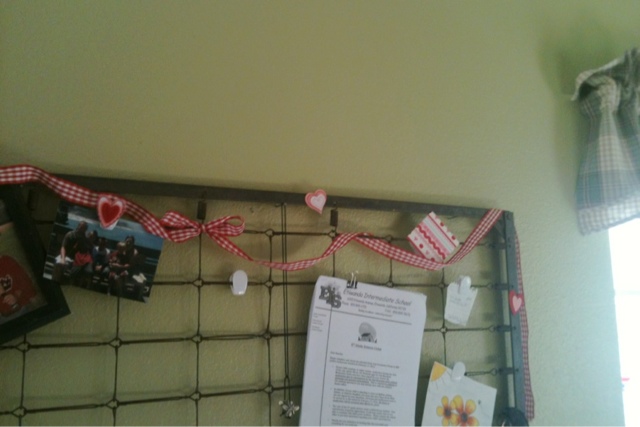
Why did my pictures go upside down today? 
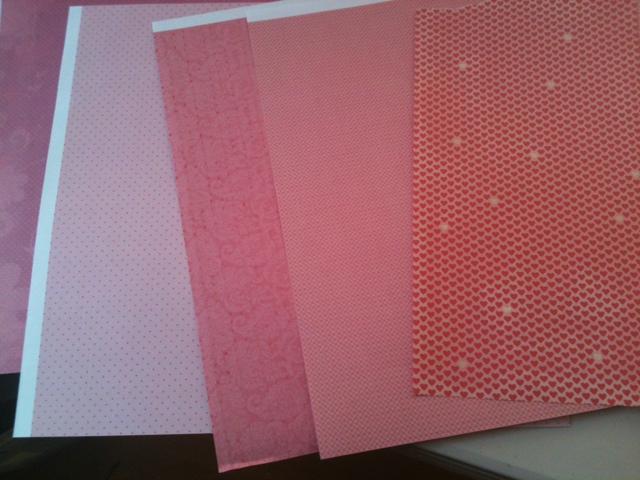
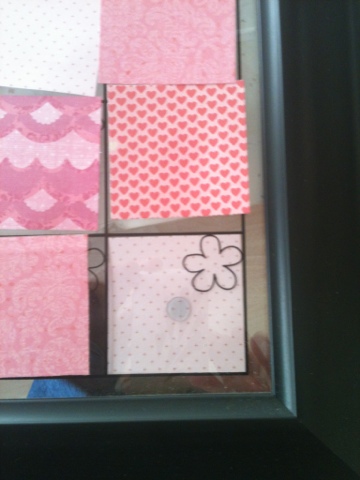
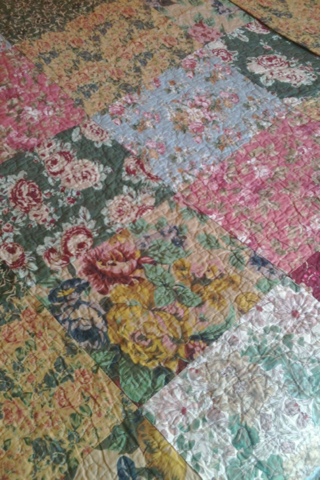
Normal scrapbook paper
 I love it because with a little paper and creativity it become a cute holiday calendar for each month. I used cheap scrapbook paper and glue tabs to transform it. I cut the paper to fit each square, I laid them out in a design I liked and once it was set used glue tabs to put it all together. Make sure you put the papers on the back of the glass. Can't wait to do other holidays.
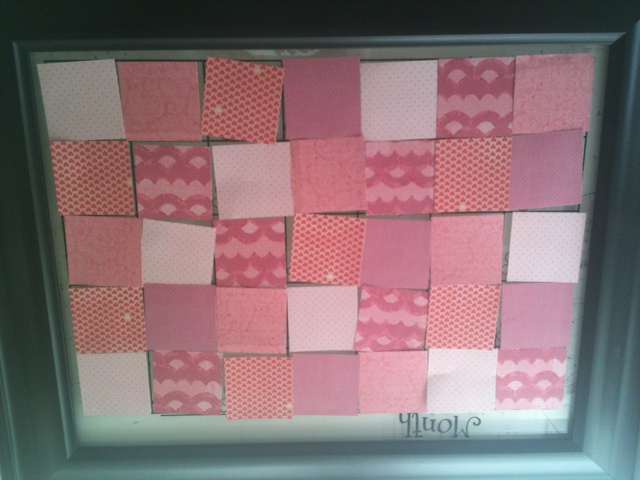
I cut the paper to fit each square and laid them all out. 
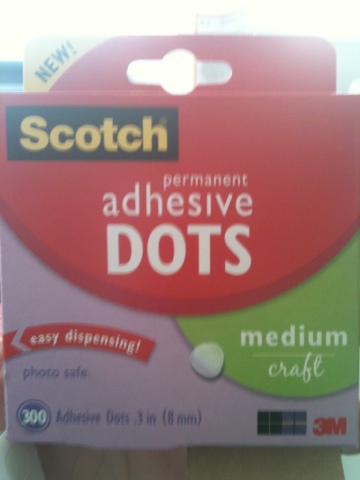
Once I got the design I liked I used these glue dots to put it all together. 
Place the glue dot on the paper and adhere behind the glass. 
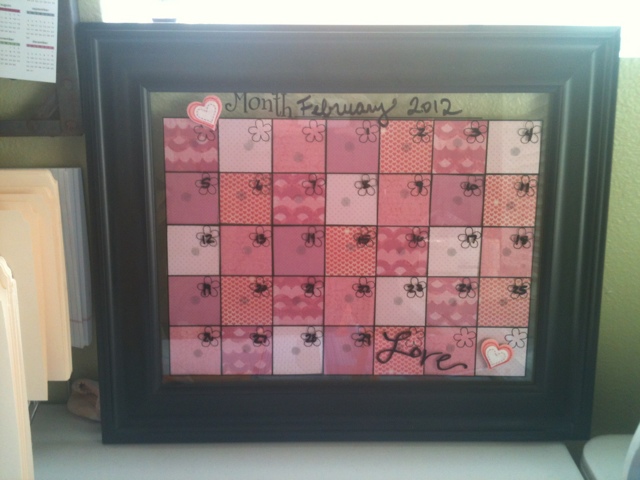
Isn't it cute? I can't wait for Halloween, St. Patrick's, Christmas, etc. So many fun ideas in store. 

Monday, January 30, 2012

New bedding

When we moved into our house our room was white. About 5 years ago my husband went away for the weekend and I decided to add chair rail and a deep burgundy color on the walls that he had picked out. I love the darkness it adds to the room when I am asleep but with dark walls, a dark burgundy quilt before, dark curtains, it always feels so dark. I decided that instead of painting the room again I would find a quilt that was bright and cheery and would help liven up the room. I have looked and looked for a new set but burgundy isn't all that popular anymore or when I did find a set I liked it was way over our price range. I look on various websites and ebay sometimes to see if I can come across a sale on something I like. After over a year I finally came across a quilt that had little touches of burgundy and tons of other great colors that I likes. I was able to win it in ebay for $30. It is brand new and I love it. Even better it is oversized and HUGE! I took a before picture of the room with the old bedding but I couldn't find it in my phone. It was a burgundy and deep brown pattern that was cheap and after one wash falling apart. What do you think of the new set?  

The bottom of the blanket touches the floor. I told you it was huge. 
The side reaches the floor as well. No more blanket fights. 
Tons of great colors. I love it. 
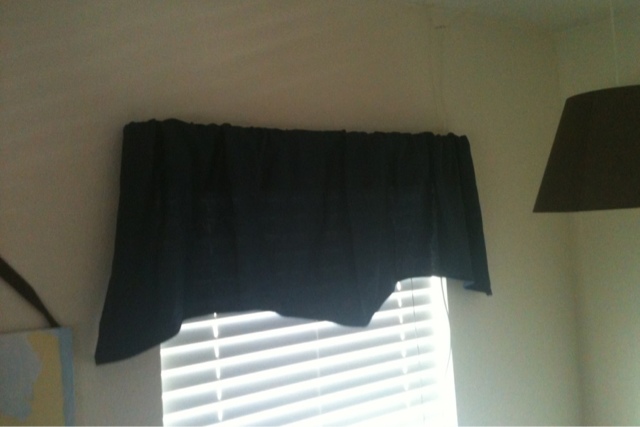
 I also installed two valances in the boys bedroom this morning between kid drop off at school and work. I knew I wanted brown or navy valances but didn't want to spend a ton. I found these at Lowes for under $2.00 each on clearance. Add a .99 rod to each window and the whole room go valances for $5. I may have to add some paw prints or something cute to liven them up but for now they look clean and complete! 

Sunday, January 29, 2012

New toilets

We got some new to us toilets that were nearly brand new. We had 2 of our 3 toilets that needed to be replaced for different reasons. My father in law got us some toilets for free that were perfect. I was going to post a how to install a toilet but between 3 trips to lowes and a few hours of frustration I decided no tutorial. On the other hand for about $20 in supplies we have two new toilets that are now perfect. It was a little of a hassle but we saved about $200 for our work. Now what do you do with old broken toilets?

Saturday, January 28, 2012

My desk area

      My work area is by far the place where I spend the most amount of time. I have tons of stuff for my business that normally looks a little (a lot) messy. After redoing the paper yesterday I decided that I needed to use the remaining shelf space to move some of the stuff off my desk and get it on those shelves. I woke up and went right to work. I organized, cleaned and purged. For my business it is key to be organized and have a great work area. 
     I didn't do anything fancy. I just cleaned and reorganized the space. I feel like I clean this area all the time but each time I buy something new or add a cool new toy to my business it takes more and more space. So the before... my sweater collection on my chair, college degree on the floor,  I cleaned the coffee cup collection last night, kids crafts in tubs under the desk, and the work area where I paint and glue everything is covered in purses and backpacks. Who wants to clean before they work? Not me!
Before. Messy and junk everywhere. 

The white board under everything is my block making area. Hmm, how am I going to make blocks on there? 

After! Clean, with everything in a place.  My crib art pretty and functional, my calendar where I can see it, a cutting area, Cricut area, writing area. I may be able to get some work done now.

Got my college degree off of the floor and back on the wall. 
Added some baskets (go figure) and tubs for stuff.  Supplies where I know my inventory.  My extra Cricut off the work table since I don't use it all the time.  Seeing this I realize I have far to much paper. 
The kinds of things you find when you clean. I thought I was out. 
Ready for work!

Friday, January 27, 2012

My business area- a billion papers

For my business I have about 10,000 papers in files like this. I have to dig through the files that are organized by color each time I make a block. It is a disaster with 2 rolling carts, piles of extra paper in front of them and an entire book shelf of more papers next to the roll carts. It is a mess and drives me batty every time I look at it. I have been looking for a solution for months. I finally came across a link on youtube where I woman made magazine holders from cardboard boxes. I thought it would be perfect but instead of magazines I would hold my crazy amounts of paper.  Here is the before. Makes you want to create doesn't it? 
Yuck!
Using USPS boxes cut in half like in the picture you get two holders that fit scrapbook paper perfectly. Isn't that awesome? The best part is I had the boxes sitting in my garage for my business and they were free. 
Close up of the boxes. I glues a piece of paper on the edge of each box with the color that is in that box to make it easier to find the color I need. 
So much better. 
Now I can easily get the papers I need and I can use them on the shelf or I can move the box to my desk area. I got this shelf unit at Lowes and although it cost about $70 it is a huge help to save time with my business so I didn't mind spending it. I have plans to rearrange things a little better in my desk area now that I have great storage but it took me so long to go through all the papers and cut the boxes I decided to save that for another day. 
I have plans to add mason jars of ribbon and a basket to hold all my paints. Cute it up a little. 

Thursday, January 26, 2012

What to do with the rest of that old crib?

     As many of you know I run a home business. I pride myself on having a pretty clean and organized (now) house but my work area is not one of those areas. I have a ton of important papers, reminders, etc. That sit on my desk in a pile. I dig through the pile when I need things and the pile gets messier. As you know we had that old crib on the side of our house the was just sitting there. I saw someone use the old crib springs in the kitchen to hold a market list, recipe cards, etc. or as a pot rack and decided to use the same idea but at my desk. Please ignore the not so neat work area, it is a project that I will be doing some time this year. If you have cute scrapbook storage ideas let me know. 
Anyways here it is on the wall. I was going to paint it but decided to keep it the rusty brown (I kind of love the old look of it) you could easily spray paint it with Rustolium spray paint to cover the rust. I used about 12 nails to hold it on the wall. If you look at the last picture you can see how I went through the springs on the crib to hold it on the wall. I made sure to find the studs and did three nails, one top, one middle and one at the base of the crib for each stud I found. It is really sturdy and even with the weight of the frames and stuff I added its totally secure. Best part is I can decorate it for holidays!  A little ribbon and cute stuff and it will be festive. 
Isn't it cute? I have some idea to decorate it up and maybe use holiday themes on it for each holiday. 
I can clip anything on it using hooks. I am going to get some clothes pins so it's cuter but for now I used what I had.  I even got my business card holder and a few of my favorite things on it.
Here is how it will look normally. 
You can tuck picture frames on it using the little foot thing on the back to stand them on a table. 
I put the nail through the springs to hold it up. Make sure you go through the stud in the wall to help support the weight. 

Wednesday, January 25, 2012

Under my bathroom sink.

Nothing fancy today. I cleaned out all the drawers and cabinets in my bathroom. I threw away expired products or stuff we just never used. It's amazing how many lotions I had and half were ones I would never wear. I have super sensitive skin so when I find something I like I buy a ton. Problem is all the ones I don't like are still there too. Just a good scrub, baskets of course and a cute tray on the counter to hold a few of my everyday things and a whole new functional space. For some reason the blog won't let me add cations to the photos today so I did the before on the left and the after on the right. Nothing fancy like I said before but clean and organized.

Tuesday, January 24, 2012

Jan 24th- the worst project to date!

I will break it gently by showing you a picture of my husbands closet. He is always clean with the doors closed. 

The top of my dresser. Isn't it pretty?
There is one project that I have been putting off. It is the WORST project I will do this whole year. Ok, that's over exaggerating but I am like a little kid when it comes to cleaning my room and putting away my clothes. We were watching an episode of hoarders last night and they always make me feel gross. My husband compared my closet to hoarders. Need I say more? I have been begging my husband to build me shelves or to spend a bunch of money on a shelving unit for my closet. I am so glad that he didn't give in because all it would have done would be allowing me to keep all the crap I have in my closet instead of just purging it. so here it is! This is the hardest picture for me to post. 
my closet before. I can't even show you the other side because I can't open the door. What you can't see is that the floor is literally covered all the way to the base of the clothes that are hanging. 


I started by taking EVERYTHING out. I sorted it by clothes type and got rid of 4 giant black trash bags of clothes that were beached, torn, old and gross or I just hated! I also got rid of things that didn't fit. I think I had the closet of 8 woman with all the sizes I had. 
I loved these sandals so much I bought a new pair that was the same, only problem is I never got rid of the old ones. Yummy!
After! Just by hanging everything up and getting rid of stuff my closet is fully functional and the best part is I didn't spend a dime! I put things like purses, hats and old memories (baby clothes) in the baskets. 

The other side of my closet. Yes, this was the side I couldn't even get to. 
The top of my dresser. Feels so good to see it again. 
Since it didn't cost a dime maybe I can convince my hubby to buy me a new bedding set. Hmm, a girl can dream.

Monday, January 23, 2012

Jan 23rd - Cleaning under the bathroom sink and a fun little air freshener

This project was a really fun one! Just kidding. I am not even going to post pictures because all I did was tidy under the bathroom sink. I had a busy day of baby sitting my niece and have a busy night of block making ahead of me. I needed something quick and easy so under the sink it is.
I also learned a little trick from another blog that I thought I would share. My family is super sensitive to smells like air freshener. I can't spray things in the house or use any of the plus in things. I saw this and I love it. If you look at my bathroom window it just looks like a normal bathroom window. If you lift up my curtain a little you will see......A tea bag! Why? Well they smell really good and aren't over powering. I use good earth because it is what I have and it smells yummy. The little tea bag (especially if we open the window) scents the whole bathroom with cinnamon, nutmeg and other spicy smells. It is subtle and no one even notices the smell because it isn't in your face. Try it and let me know what you think.
One tea bag hidden in my bathroom and I am a happy Mommy. 

Sunday, January 22, 2012

Jan. 22nd - crib rail blanket rack

As I was redoing the closet yesterday I decided that even if the closet only had blankets in it, it still looked messy. I decided that I was going to buy an old ladder to hang the blankets on by leaning against a wall. Antique ladders are wildly popular right now because of the fun craft people are using them for. Since I don't have or want to spend $100 on a ladder I decided to use our boys old crib. 
It seems like everyone either has or knows someone who has an old crib. Ours has been sitting on the side of our house waiting to be put in the trash for 5 years! I started with one side of the crib and decided I would mount it on the wall. That idea fizzled out and as I was trying to think of other ideas my Hubby came to the rescue. He had the great idea that adding the other side of the crib, a few screws and using a few spindles that we had taken off of one side and adding them to the other side would make a fun hanging rack. I must say I was impressed with his idea and I am thrilled with the final outcome. It took us about 2 hours with build and paint time and the cost was free! Can't beat free. So, here is the breakdown if you want to make one. The best part is the memory of my children's crib is in the house again and in use. Even more fun because the tooth marks of the teething days are still on it. That part kind of melted my heart a bit. 
The starting point. 2 crib sides. We decided that to be able to fit the blankets we would cut out every other spindle .
the saw we used to cut the spindles off. 
The dirty removed spindles. What craft can I make with these? I saved them for something fun. 
We added these little brackets with 2 screws at the top to secure the top. We screwed two of the cut off spindles to the bottom for support. Super easy. It looked dirty and gross so we lightly sanded the old varnish off and got it ready to paint. 
Fresh coat of black paint. 

All loaded up with blankets and ready to use. 
We hung the blankets like you would a towel on a towel rack. It fit them all perfectly and they are off the floor.